martes, 14 de julio de 2015

Microsoft SQL Server AlwaysOn - Create Availability Group Fails With Error 35250 'Failed to join the database'

You can create an availability group using the New Availability Group wizard or using a series of transact-sql commands. A common failure can occur when attempting to create an availability group using either method. The error is as follows and is caused because the target primary and secondary replicas are unable to communicate:
Msg 35250, Level 16, State 7, Line 1
The connection to the primary replica is not active.  The command cannot be processed.
If creating the availability group using the New Availability Group wizard, the 'Joining <availability database> to availability group <availability group> at <replica>' will fail. Clicking the Error link, message 35250 is reported: 
 
If you used transact-sql to create the availability group instead of the New Availability Group wizard, the ALTER DATABASE...SET HADR AVAILABILITY GROUP... command fails with message 35250:
Following is a list of common causes for this failure and steps to diagnose each.

Reason - Inbound Port 5022 Traffic is Blocked

IMPORTANT: By default, AlwaysOn configures the database mirroring endpoints to use port 5022, and the following document will use 5022 when discussing the database mirroring endpoint in use for availability groups. However, this may not be the configured port for the database mirroring endpoints in your environment.  Query sys.tcp_endpoints on each replica to confirm which port is being used:
select name, type, port from sys.tcp_endpoints where type_desc='database_mirroring'
go
By default inbound traffic is blocked in Windows firewall.
Port 5022 is used by the primary and secondary replicas for synchronization and communication purposes. Traffic must be allowed inbound on this port. Testing has shown that if port 5022 inbound traffic is blocked at the primary, at the secondary or at both, you will be unable to create the availability group and message 35250 will be reported.

Reason - Endpoint is not created or started

Ensure the mirroring endpoints are created and started on the primary and the secondary replicas.
To detect if the endpoints are created, query for database_mirroring endpoints at the primary and the secondary.
:Connect SQLNODE1
select name, state_desc, port from sys.tcp_endpoints where type_desc='DATABASE_MIRRORING'
go
:Connect SQLNODE2
select name, state_desc, port from sys.tcp_endpoints where type_desc='DATABASE_MIRRORING'
go
If you find an endpoint does not exist, create it:
:Connect SQLNODE1
create endpoint [Hadr_endpoint]
 state=started
 as tcp (listener_port = 5022, listener_ip = all)
 for database_mirroring (role = all, authentication = windows negotiate, encryption = required algorithm aes)
go
To detect if the endpoints are started, query them at the primary and the secondary.
:Connect SQLNODE1
select name, state_desc, port FROM sys.tcp_endpoints where name='hadr_endpoint'
go
:Connect SQLNODE2
select name, state_desc, port from sys.tcp_endpoints where name='hadr_endpoint'
go
If you find an endpoint is not running, start it:
 :Connect SQLNODE1
alter endpoint [Hadr_endpoint] state = started
IMPORTANT: There is a known issue in which sys.tcp_endpoints.state_desc may incorrectly report the endpoint as STARTED when it is not started. It is a good idea to execute the ALTER ENDPOINT command for the endpoint at each replica, despite the report given by sys.tcp_endpoints, queried above.

Reason - Endpoint permissions

If database mirroring endpoints are configured to use Windows authentication, ensure that the SQL Server instances hosting your availability replicas run with a SQL Server startup account are domain accounts.
The New Availability Group wizard catches this misconfiguration, and reports it. Note that the Endpoints tab is displayed and the SQL Server Service Account reports that one of the replica's startup account is configured for LocalSystem.
If you proceed by clicking Yes and complete the wizard, it will fail during the 'Joining <availability database> to availability group <availability group> at <replica>.'
If you are attempting to create an availability group using transact-sql, this configuration problem will not be detected and command ALTER DATABASE...SET HADR AVAILABILITY GROUP...  will fail with 35250. 

Reason - SQL Server is not listening on port 5022

If SQL Server is unable to listen on port 5022, the New Availability Group wizard and the transact-sql command ALTER DATABASE...SET HADR AVAILABILITY GROUP...  will fail with 35250. 
 To determine if SQL Server is listening on port 5022, review the SQL Server error log. You should find the following message(s) in the SQL Server error log:
2013-12-09 08:52:25.47 spid23s     Server is listening on [ 'any' <ipv6> 5022].
2013-12-09 08:52:25.47 spid23s     Server is listening on [ 'any' <ipv4> 5022]. 
SQL Server may not be able to listen on port 5022 if another application is already listening on the port. If you find that SQL Server is not listening on port 5022 because it is already being used, run 'netstat -a' to determine what application is using the port:

Additional diagnostics - query sys.dm_hadr_availability_replica_states on the secondary

 If the above settings check out, query the sys.dm_hadr_availability_replica_states for the last_connect_error_number which may help you diagnose the join issue. Depending on which replica was having difficulty communicating, you should query both the primary and secondary for the local replica:
select r.replica_server_name, r.endpoint_url,
rs.connected_state_desc, rs.last_connect_error_description, 
rs.last_connect_error_number, rs.last_connect_error_timestamp 
from sys.dm_hadr_availability_replica_states rs join sys.availability_replicas r
on rs.replica_id=r.replica_id
where rs.is_local=1
For example, if the secondary was unable to communicate with the DNS server or if a replica's endpoint_url was configured incorrectly when creating the availability group, you may get the following results:


lunes, 13 de julio de 2015

Error installing SQL Server 2012, or Error installing SQL Server 2014?

If you try doing the out of the box install for SQL Express 2014, SQL Express 2012 (or for that matter SQL Server 2012 or SQL Server 2014) and just want to set up a simple development PC then you will probably get the same error I did:
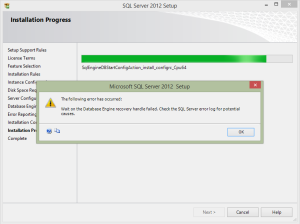
… “Wait on the Database Engine recovery handle failed. Check the SQL Server error log for potential causes.”
(for the impatient, skip down a page or two for the fix)
SQL Express 2012, SQL Express 2012 SP1, SQL Enterprise 2012, SQL Express 2014 or SQL Enterprise 2014 will all generate this same message:
sql 2012 install error
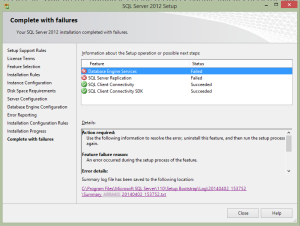
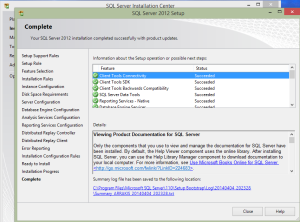
Once you click OK, installation proceeds to the end and shows (in my case) what actually did not install correctly, along with links to the error log:
sql 2012 error summary
the error logs aren’t a lot of help, typically you get something like this:
Configuration file:            C:\Program Files\Microsoft SQL Server\110\Setup Bootstrap\Log\20140402_153752\ConfigurationFile.ini
Detailed results:
  Feature:                       Database Engine Services
  Status:                        Failed: see logs for details
  Reason for failure:            An error occurred during the setup process of the feature.
  Next Step:                     Use the following information to resolve the error, uninstall this feature, and then run the setup process again.
  Component name:                SQL Server Database Engine Services Instance Features
  Component error code:          0x851A0019
  Error description:             Wait on the Database Engine recovery handle failed. Check the SQL Server error log for potential causes.
  Error help link:               http://go.microsoft.com/fwlink?LinkId=20476&ProdName=Microsoft+SQL+Server&EvtSrc=setup.rll&EvtID=50000&ProdVer=11.0.2100.60&EvtType=0xD15B4EB2%400x4BDAF9BA%401306%4025&EvtType=0xD15B4EB2%400x4BDAF9BA%401306%4025
  Feature:                       SQL Server Replication
  Status:                        Failed: see logs for details
  Reason for failure:            An error occurred for a dependency of the feature causing the setup process for the feature to fail.
  Next Step:                     Use the following information to resolve the error, uninstall this feature, and then run the setup process again.
  Component name:                SQL Server Database Engine Services Instance Features
  Component error code:          0x851A0019
  Error description:             Wait on the Database Engine recovery handle failed. Check the SQL Server error log for potential causes.
  Error help link:               http://go.microsoft.com/fwlink?LinkId=20476&ProdName=Microsoft+SQL+Server&EvtSrc=setup.rll&EvtID=50000&ProdVer=11.0.2100.60&EvtType=0xD15B4EB2%400x4BDAF9BA%401306%4025&EvtType=0xD15B4EB2%400x4BDAF9BA%401306%4025
  Feature:                       SQL Client Connectivity
  Status:                        Passed
  Feature:                       SQL Client Connectivity SDK
  Status:                        Passed
Rules with failures:
attempt at repair didn’t entirely work, though at least a few more features appeared ok afterwards, seems the features that failed weren’t really installed to begin with.
  Configuration file:            C:\Program Files\Microsoft SQL Server\110\Setup Bootstrap\Log\20140402_164618\ConfigurationFile.ini
Detailed results:
  Feature:                       Database Engine Services
  Status:                        Failed: see logs for details
  Reason for failure:            An error occurred during the setup process of the feature.
  Next Step:                     Use the following information to resolve the error, and then try the setup process again.
  Component name:                SQL Server Database Engine Services Instance Features
  Component error code:          0x84B40002
  Error description:             The SQL Server feature 'SQL_Engine_Core_Inst' is not in a supported state for repair, as it was never successfully configured. Only features from successful installations can be repaired. To continue, remove the specified SQL Server feature.
  Error help link:               http://go.microsoft.com/fwlink?LinkId=20476&ProdName=Microsoft+SQL+Server&EvtSrc=setup.rll&EvtID=50000&ProdVer=11.0.2100.60&EvtType=0x2841E06E%401204%402&EvtType=0x2841E06E%401204%402
  Feature:                       SQL Server Replication
  Status:                        Failed: see logs for details
  Reason for failure:            An error occurred for a dependency of the feature causing the setup process for the feature to fail.
  Next Step:                     Use the following information to resolve the error, and then try the setup process again.
  Component name:                SQL Server Database Engine Services Instance Features
  Component error code:          0x84B40002
  Error description:             The SQL Server feature 'SQL_Engine_Core_Inst' is not in a supported state for repair, as it was never successfully configured. Only features from successful installations can be repaired. To continue, remove the specified SQL Server feature.
  Error help link:               http://go.microsoft.com/fwlink?LinkId=20476&ProdName=Microsoft+SQL+Server&EvtSrc=setup.rll&EvtID=50000&ProdVer=11.0.2100.60&EvtType=0x2841E06E%401204%402&EvtType=0x2841E06E%401204%402
  Feature:                       SQL Browser
  Status:                        Passed
  Feature:                       SQL Writer
  Status:                        Passed
  Feature:                       SQL Client Connectivity
  Status:                        Passed
  Feature:                       SQL Client Connectivity SDK
  Status:                        Passed
  Feature:                       Setup Support Files
  Status:                        Passed
Rules with failures:
Some people suggesting changing security on %userprofile%\AppData\Microsoft\Roaming\Microsoft\Protect\ folder, but the user accounts are generated during install, so the logical thing (well it worked for me) was to simply re-use LOCAL SERVICE and NETWORK SERVICE accounts instead.
Caveat: this is a development machine, not production, I’m a developer not a DBA – this is convenient and expedient for me.
THE FIX
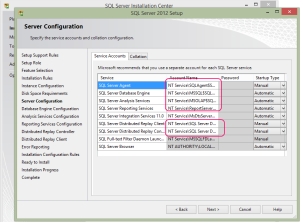
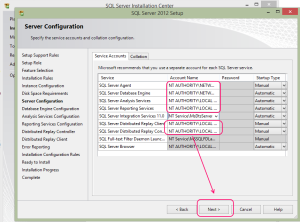
Short version: the fix for SQL 2012 or SQL 2014 installs is the same, just manually set the security for “SQL Server Agent” and “SQL Server Database Engine” to “NETWORK SERVICE”,
and for “SQL Server Analysis Services”, “SQL Server Reporting Services”, and if used for “SQL Server Distributed Replay Client” and “SQL Server Distributed Replay Controller” all to “LOCAL SERVICE”
Long version, below:
Here’s the complete install procedure end to end for the demo of SQL Server 2012 Enterprise, however the procedure is much the same for 2014 or SQL Express as well.
SQL 2012 or SQL 2014 installation step 1 ... Launch the installation by running setup.exe, click on "Installation"
SQL 2012 or SQL 2014 installation step 1
Launch the installation by running setup.exe, click on “Installation”

SQL 2012 or SQL 2014 installation step 2
Once you click on Installation, click on “New SQL Server stand-alone installation or add features to an existing installation”

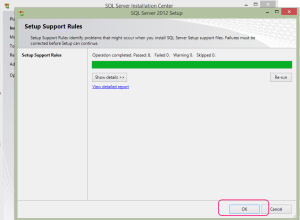
SQL 2012 or SQL 2014 installation step 3
After the checks are completed, click OK

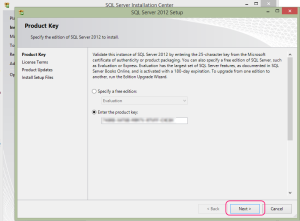
SQL 2012 or SQL 2014 installation step 4
choose your version, click Next

SQL 2012 or SQL 2014 installation step 5
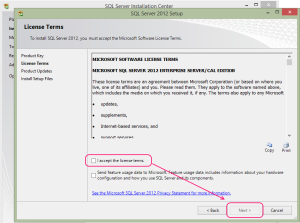
Click at least “I accept the license terms” (once you do), and optionally click “Send feature usage..” then click Next


SQL 2012 or SQL 2014 installation step 6
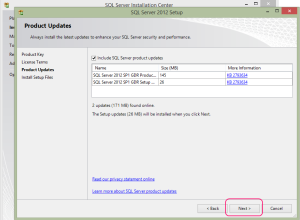
Doesn’t hurt to leave the checkbox on, allow installer to add the updates now. BTW This will vary depending on your install of SQL 2012 or 2014. Click Next.

SQL 2012 or SQL 2014 installation step 7
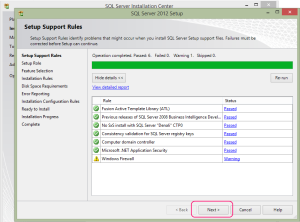
If all is well, you should see something similar to this. If there are issues, correct them, as advised, and come back here.
(For me Firewall was not a problem as this was a standalone dev. machine and not for other’s consumption.) Click Next
SQL 2012 or SQL 2014 installation step 8
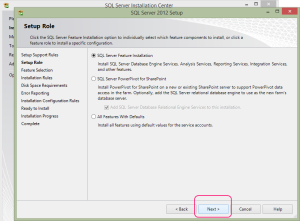
Leave the choice here on “SQL Server Feature Installation” to allow you to change the settings. Click Next

SQL 2012 or SQL 2014 installation step 9.1
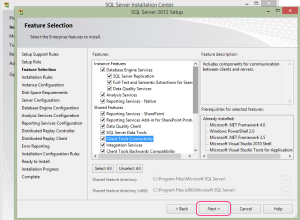
Choose your options. Note that you may see different features in SQL 2012 vs SQL 2014. Click Next when your options have been selected.

SQL 2012 or SQL 2014 installation step 9.2
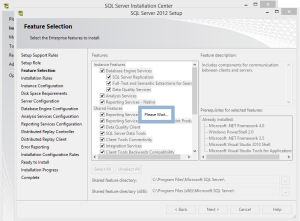
not too long to wait …

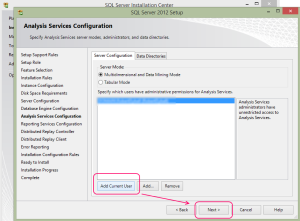
SQL 2012 or SQL 2014 installation step 10
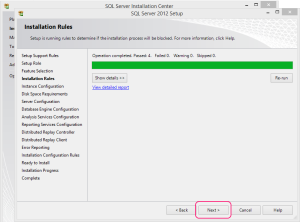
After further checks, click Next

SQL 2012 or SQL 2014 installation step 11
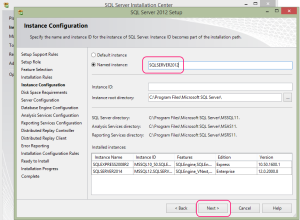
Create a unique name. If you have just one SQL instance you could call it say SQLSERVER or SQLEXPRESS. IMO good to plan ahead, as you might find it useful to install a different version of SQL server to allow you to do development of server to server / ETL queries etc. Click NEXT when completed.

SQL 2012 or SQL 2014 installation step 12
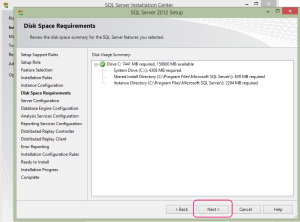
another intermediate check, this time for space, just click Next.

SQL 2012 or SQL 2014 installation step 13.1
This is where you need to change from the default user accounts (most of which do not exist yet).

SQL 2012 or SQL 2014 installation step 13.2
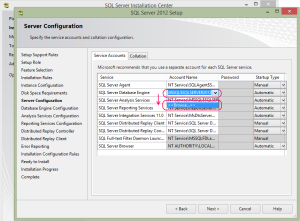
Choose one of the account names, scroll down and select “<<Browse…>>”

SQL 2012 or SQL 2014 installation step 13.3
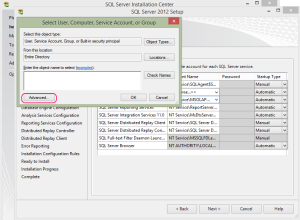
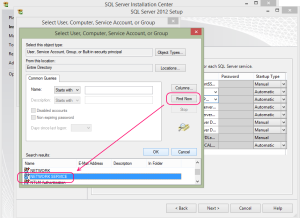
When you click browse, the account selection window pops up, click Advanced.

SQL 2012 or SQL 2014 installation step 13.4
Click Find Now, then choose NETWORK SERVICE (or LOCAL SERVICE) depending on the service you are configuring. Click OK

SQL 2012 or SQL 2014 installation step 13.5
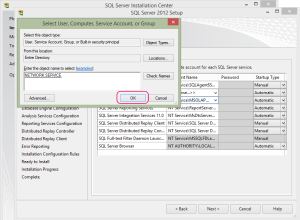
You will be returned to the original popup, check the account selected, then click OK

SQL 2012 or SQL 2014 installation step 13.6
Repeat until you change these accounts to either NETWORK SERVICE or LOCAL SERVICE, as shown, then click Next.

SQL 2012 or SQL 2014 installation step 14.1
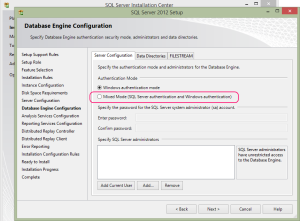
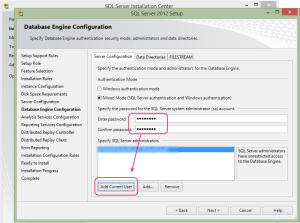
I usually select Mixed Mode, as it (a) gives me a back door in case something goes wrong, and (b) to be able to develop apps using name/password as opposed to using window authentication.

SQL 2012 or SQL 2014 installation step 14.2
If using Mixed Mode, enter a password (twice)
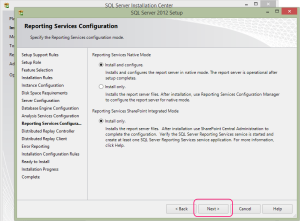
Either way, make sure you click “Add Current User”, and you will find your local user account is added as a SQL Server Administrator.

SQL 2012 or SQL 2014 installation step 14.3
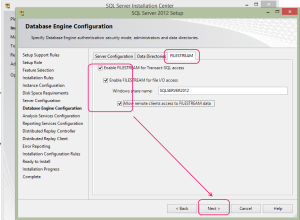
If you want to experiment with Filestream development, make sure you select the “FILESTREAM” tab, and select these options.
Make sure while there you add a sharename, as shown. This can be set to correspond with your SQL instance name.
Once completed, click Next

SQL 2012 or SQL 2014 installation step 15
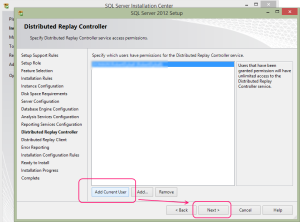
Click “Add Current User”, then click Next

SQL 2012 or SQL 2014 installation step 16
Click Next

SQL 2012 or SQL 2014 installation step 17
Click “Add Current User”, then click Next

SQL 2012 or SQL 2014 installation step 18
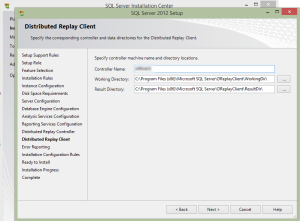
Add your local machine name, then click Next.

SQL 2012 or SQL 2014 installation step 19
Optional checkbox, click Next

SQL 2012 or SQL 2014 installation step 20
Another pre-install check, wait a bit, click Next

SQL 2012 or SQL 2014 installation step 21
A summary of what will be installed, click Next

SQL 2012 or SQL 2014 installation step 22
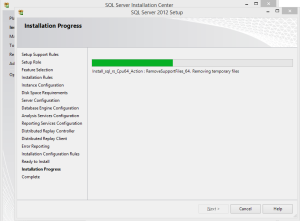
Time for coffee .. waiting ..

SQL 2012 or SQL 2014 installation step 23
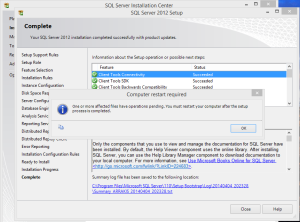
The end of install, almost .. if you are lucky you might need to reboot (don’t worry though, the reboot is not forced).
Click OK

SQL 2012 or SQL 2014 installation step 24
there’s a brief message, just wait.

SQL 2012 or SQL 2014 installation step 25
Finally you can click Close.
You are not forced to reboot, but now is the time (if you were prompted that you needed to), to reboot.

Installed SQL Server features discovery report

Have you ever faced a situation where in you had to double check what all features you deployed for your SQL Server environment ? Oh! did I selected Full-Text search feature during installation?
There are many number of ways you can double check the features which are available
1. Check services running under SQL Server Configuration Manager
2. Check the install folders for logs(Example – C:\Program Files\Microsoft SQL Server\110\Setup Bootstrap\Log) which will give details about features.
Think about getting a report of this! Wow,that’s a cool thing isn’t? This is what exactly ‘Installed SQL Server features discovery report’ wizard does for you.
You need to run SQL Server setup to launch this wizard and this is rightly available under the tool section of the page which we have seen many times –
We just need to run this option and it will provide us with a very structured report which talks about all the features which were installed for the server.
I was amazed to know couple of  features(Example – LocalDB) were present in my machine.
The contents of the report is actually getting pulled from the summary.txt file which is created after the install is completed (C:\Program Files\Microsoft SQL Server\110\Setup Bootstrap\Log\summary.txt)
So,if you just need the data then its easy to look at the file rather than running the setup.exe.However the report looks neat and structured.
Thanks for reading.